My team at Microsoft is attempting to model and relate the many logical and physical entities that exist across Azure. This is a large and complicated task and we make use of Ontology specialists to help guide the modeling work.
Ontology (n): a set of concepts and categories in a subject area or domain that shows their properties and the relations between them.
Working with Ontologists for the first time exposed me to a new world of terminology and tools. They model our project in a format called OWL (Web Ontology Language). This provides a language to describe objects and represent the relationships between them.
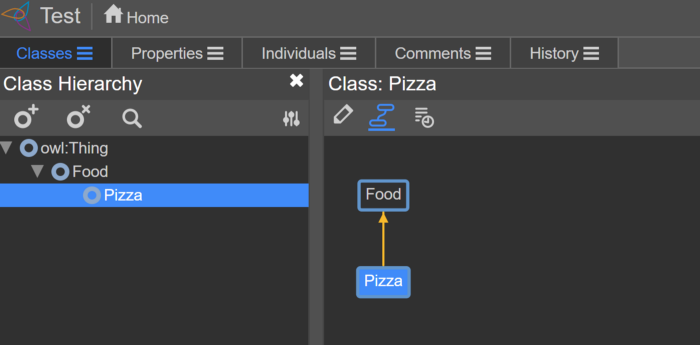
A popular editor for authoring OWL is called WebProtégé. This is developed at Stanford and provides a GUI to make it easy to create and explore an OWL based ontology.

WebProtege Kubernetes on AKS
When onboarding Ontologists onto our team, we were asked to host an instance of the WebProtege tool to enable them to work together and collaborate. There exists a shared instance hosted by Stanford but we needed to host it internally for privacy reasons.
The WebProtege’s GitHub repo has instructions for deploying using Docker Compose, but I decided to deploy this using Kubernetes on Azure Kubernetes Service (AKS).
WebProtege requires two containers: a MongoDB storage layer and the WebProtege app itself.
MongoDB
To deploy MongoDB we need three Kubernetes objects
- Deployment — deploys the MongoDB container to Pods and determines how many replicas (defaulted to one).
- Service — provides access to the pod.
- PersistentVolumeClaim — ensures the MongoDB data is stored somewhere that will persist after restarts.
I defined them together in one YAML file (mongo.yaml):
apiVersion: v1
kind: PersistentVolumeClaim
metadata:
  name: mongo-pvc
spec:
  accessModes:
    - ReadWriteOnce
  resources:
    requests:
      storage: 256Mi
---
apiVersion: v1
kind: Service
metadata:
  name: mongo
spec:
  selector:
    app: mongo
  ports:
    - port: 27017
      targetPort: 27017
---
apiVersion: apps/v1
kind: Deployment
metadata:
  name: mongo
spec:
  selector:
    matchLabels:
      app: mongo
  template:
    metadata:
      labels:
        app: mongo
    spec:
      containers:
        - name: mongo
          image: mongo:4.1-bionic
          ports:
            - containerPort: 27017
          volumeMounts:
            - name: storage
              mountPath: /data/db
      volumes:
        - name: storage
          persistentVolumeClaim:
            claimName: mongo-pvc
The most interesting part is the PersistentVolumeClaim. This provides persisted storage for MongoDB. When deploying on AKS this creates an instance of Azure Disk Storage behind the scenes with the requested amount of memory.
WebProtege App
For the WebProtege app we need two Kubernetes objects
- Deployment — configures and deploys the container for the WebProtege app.
- Service — provides external access to the app using the LoadBalancer service type.
These two are defined together in the file protege.yaml:
apiVersion: v1
kind: Service
metadata:
  name: protege
  annotations:
    service.beta.kubernetes.io/azure-dns-label-name: myprotege
spec:
  selector:
    app: protege
  ports:
    - port: 80
      targetPort: 8080
  type: LoadBalancer
---
apiVersion: apps/v1
kind: Deployment
metadata:
  name: protege
spec:
  replicas: 1
  selector:
    matchLabels:
      app: protege
  template:
    metadata:
      labels:
        app: protege
    spec:
      containers:
        - name: protege
          image: protegeproject/webprotege
          ports:
            - containerPort: 8080
          env:
            - name: MONGO_URL
              value: mongodb://mongo:27017/dev
            - name: webprotege.mongodb.host
              value: mongo
          imagePullPolicy: Always
In the Deployment object I reference the port and name defined in the MongoDB deployment and pass that into an environment variable for the WebProtege container.
The Service object in this case is of type LoadBalancer which enables external access to the Pods. By default, AKS will provision a PublicIP address for this service. However, this is not a fixed static IP and if you delete and re-provision your service it may change. For that reason you can add an annotation that tells Azure to provision a DNS name for the PublicIP address.
service.beta.kubernetes.io/azure-dns-label-name: myprotege
This will result in a url like myprotege.westus2.cloudapp.azure.com. This allows persistent access even if the ip address changes.
And deploy on AKS …
With those in-place you can deploy a fresh Kubernetes cluster on AKS with the following script (assuming you already have a subscription configured) using az commandline client.
#!/bin/bash
echo "Login to your azure account"
az login
echo "Select your subscription"
az account set -s "YOUR_SUBSCRIPTION_ID"
echo "Create Resource Group"
az group create --name myprotege --location westus2
echo "Create AKS Cluster"
az aks create --resource-group myprotege --name myprotegeAKS --node-count 1 --generate-ssh-keys
echo "Load Credential for KubeCtl to use"
az aks get-credentials --resource-group myprotege --name myprotegeAKS
echo "Deploy Mongo"
kubectl apply -f mongo.yaml
echo "Deploy Protege"
kubectl apply -f protege.yaml
Once this finishes you should have a running container of WebProtege and MongoDB. The next step is to follow the initial configuration step to create an admin account from their docs. For this step you need to get shell access to the container running the instance of WebProtege.
To do that first get the list of pods:
> kubectl get pods
NAME                       READY   STATUS    RESTARTS   AGE
mongo-d86dd97bd-rc9zq      1/1     Running   0          2m10s
protege-678fb4955b-xf64m   1/1     Running   0          2m10s
And then open a shell into the pod:
> kubectl exec -it protege-678fb4955b-xf64m -- /bin/bash
Once in there you can run the required configuration command:
# java -jar /webprotege-cli.jar create-admin-account
And that’s it! You should now have a running and configured instance of WebProtege.
All you need to do is go to http://myprotege.westus2.cloudapp.azure.com/#application/settings (or whatever you configured above) and finish the final UI steps.
